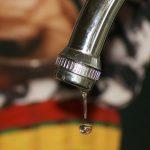
Everyone can attest to how irritating a constantly dripping tap can be. Not only is it annoying, but it’s also wastefully leaking water and adding unnecessary digits to your bill. If you’re unsure whether a plumber could remedy such a situation, this blog post brings great news: they certainly can! Sit tight and learn how plumbers resolve tap drips and how you might even try some fixes yourself.
Contents
- Can Plumbers Resolve Tap Drips?
- Why Tap Handles Might Leak
- Essential Tools for Tap Repairs
- Procedure for Fixing Dripping Handles
- Identifying Your Tap Design
- Deactivating the Water Supply
- Repairing the Leaky Component
- How to Reconstruct Your Tap
- Local Professional Assistance Availability
- Preventing Potential Tap Drips
- Determining Repair Costs for Taps
- Wrapping It All Up
Can Plumbers Resolve Tap Drips?
Absolutely! A well-trained plumber can troubleshoot and fix almost any plumbing problem, including leaking tap handles. They are equipped with a broad skillset that covers diverse areas of plumbing like heating, ventilation and air conditioning (HVAC systems). With long-term experience dealing with all kinds of taps and valves, they have the right kind of expertise you need.
Centred on statistics by the American Water Works Association, taps are often one of the primary culprits of residential water leaks, accounting for up to 15% of all residential water use. Some studies indicate that fixing simple household water leaks could save homeowners up to 10% on their taxes. Thus, fixing them promptly can lead to significant savings – this is where a reliable plumber comes in!
Why Tap Handles Might Leak
Tap handles drip due to several reasons relating more often to the internal mechanisms which may be worn out or damaged. Ageing O-rings or cartridges inside the tap are common causes. Another issue involves the set screw which keeps the handle secure. Once loose, this screw typically results in a leaking tap handle.
All these manufactured goods are made from different building materials, each with its specific lifespan and susceptibility to damage from water, chemical exposure or mechanical wear and tear. A seasoned plumber usually easily sniffs out the cause and recommends the necessary steps to resolve the issue.
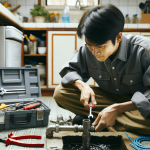
Essential Tools for Tap Repairs
Equipment and tools used during tap repairs largely hinge on your tap design. Typically, you’ll need a set of screwdrivers, an adjustable wrench or pliers, and potentially valve-specific tools like cartridge pullers. Though these are typical household items, some special taps call for unique tools unlikely found in your toolbox.
An experienced plumber usually comes with their full toolkit including manufactured goods like construction and hydraulic equipment necessary to work on specific designs of taps or valves. The Master Plumbers and Mechanical Services Association of Australia (MPMSAA) often emphasises the importance of good tools in ensuring professional work quality.
Procedure for Fixing Dripping Handles
The first step to fixing a dripping tap handle is identifying your tap design properly. We’ll be touching on that shortly. Once you’ve figured that out, deactivate the water supply to your sink or bathtub. You will then dismantle the handle and check the internal parts for any glaring damages.
If damage is detectable to the naked eye, repair or replacement is mandatory. For example, if a worn-out O-ring is suspected to cause leaks, you’ll remove it with needle-nose pliers, replace it with a new one, lubricate it and reassemble your tap. A similar approach applies if you’re replacing a cartridge or tightening a loose screw.
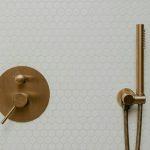
Identifying Your Tap Design
Taps come in all sorts of designs. Examples include ball taps that have a ball bearing; cartridge (sleeve) taps that come with a cartridge (movable up and down for water control); and disc taps featuring a cylinder. These are just three examples among many more designs available in today’s market.
The intricacies of your tap’s mechanical engineering and the type of equipment needed make it crucial to identify your tap design. Identifying not only makes your process efficient when troubleshooting a leaking handle, but also when purchasing replacement parts.
Deactivating the Water Supply

Before you tinker with your tap to fix the dripping handle, ensure you deactivate the water supply. The water valve is usually located under the sink. Simply turn this clockwise until no more water can flow from your tap. Trust me; you don’t want to contend with a flooding scenario on top of the leaking tap!
This step is crucial to reduce potential water damage during repair processes and prevents wasting water unnecessarily. Statistically speaking, household leaks account for nearly 900 billion gallons of wasted water annually nationwide, as reported by EPA. You wouldn’t want to contribute to that, would you?
Repairing the Leaky Component
Handling tap valve repairs might seem daunting, but by employing a combination of practical tools, a bit of mechanical engineering knowledge, and some good ole’ Aussie can-do attitude – it’s entirely manageable! If you have noticed that your tap’s handle is leaking, it might be because the fasteners, such as the set screw or nut, need to be tightened. Also, there could be faults with the manufactured goods inside the tap like the cartridge. These elements control water flow and temperature.
Isolating the problem initially involves turning off the water supply, either at the sink’s shut-off valve under your sink or at your house’s main water supply. Then remove the tap handle using a screwdriver and inspect for wear or damages. Rusted or mineral-deposited components might require cleaning or replacing. A leaky tap might just be an early sign of more significant hardware problems.
How to Reconstruct Your Tap
Successfully identifying a worn-out part is half of the job done! The next step is putting everything back together. Each component needs to be thoroughly cleaned before being put back into place. Soak each part in a vinegar solution to break down any mineral deposits. Now it’s time to tackle those components associated with hydraulics that control the water flow.
You would use new washers if they need replacing and make sure your valve seat is not cracked or worn out. Consider using quality building materials when looking for replacement parts because this can significantly extend the life expectancy of your plumbing equipment. Here is a detailed guide on how to reconstruct your tap correctly.
Local Professional Assistance Availability
If you’ve tried to repair the leak yourself but have been unsuccessful, don’t stress! Even the most seasoned DIY enthusiast could struggle sometimes, particularly where more complex home appliances and equipment are involved. Plumbing systems, including any civil engineering elements like sinks or HVAC (heating, ventilation, and air conditioning) units, can pose various challenges.
Here at Dan’s Plumbing, we are always ready to step in and help out. Our team of professionals specializes in everything from plumbing to air conditioning to more advanced hydraulic engineering services. We’re locals just like you, fully trained in the Australian metric system, making us your ideal solution for speedy plumbing related issues.
Preventing Potential Tap Drips
Maintaining regular checks on your taps can save you from a multitude of potential problems later. Regular cleaning of your sink’s aerator plays a significant role as it frequently gets blocked with mineral deposits restricting water flow. It is important to remember that hardlines (water supply pipes) can be susceptible to wear and tear, so keep an eye out for any signs of damage.
Practicing preventive measures not only guarantees smoother running taps but also helps reduce water wastage. Ensuring correct water pressure in your plumbing infrastructure is important too; high pressure might lead to leaks or drips as it strains your system over time.
Determining Repair Costs for Taps
The cost of repairing taps depends largely on the type of tap (valve), the extent of the damages incurred, and whether any parts need replacing. Here at Dan’s Plumbing, we make it a point to be transparent with our pricing structure so no nasty surprises when you receive the bill!
If a simple tightening won’t fix the job and there’s a need for part replacement – especially if we’re talking about high-quality cartridges or valves – the costs can add up. Depending on the complexity of your system and the parts used, a repair might cost somewhere in the ballpark of a few hundreds of dollars.
Wrapping It All Up
While fixing a leaking tap handle could be a DIY task for some, you should not hesitate to call in professionals if needed. Regular maintenance helps in preventing such issues and saving water. Being aware of potential repair costs ensures that it doesn’t weigh heavy on your pocket. Remember, Dan’s Plumbing is always there to help with any plumbing hiccups!
- Can I Get a Plumber to Help Me Install An Under Sink Water Boiler in Our Office Kitchen? - September 14, 2024
- Can a Plumber Help Me Clear a Badly Clogged Toilet? - September 4, 2024
- Can a Plumber Help Me to Replace a Bathtub Drain Stopper? - August 29, 2024
Related posts:
 Can a Plumber Fix My Leaking Pipe?
 How Do I Fix a Leaking Bathtub Tap?
 Can Your Plumbers Help Me Fix a Leaking Shower Diverter?
 What Should I Do If My Hot Water Service Is Leaking? Is It Time For a Plumber to Replace The Whole System?
 How to Know When You Need to Get a Plumber to Replace a Shower Cartridge? And How Do These Work?
 Can a Plumber Help Me Install a New Bathroom Tap?