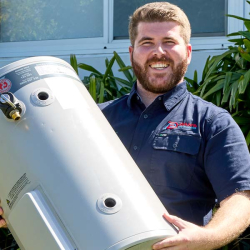
As the owner of Dan’s Plumbing and a seasoned professional in the industry, I understand how a leaking bathtub tap can be a nuisance. While it might seem like a minor inconvenience, it can lead to significant water loss and higher utility bills if not addressed promptly. So, let’s address this issue with a step-by-step guide on how to fix that pesky, leaky tap.
Contents
- Identifying Tap Leakage Causes
- Preparation Prior to Repair
- Gathering Necessary Materials
- Initial Quick Fix Attempts
- Sink and Tap Troubleshooting
- 6-Step Leaking Tap Solution
- Valuable Hints for Repairs
- Take Precautions, Stay Safe
- Understanding the Leaking Bathtub Tap
- Conclusion: Fix It Right
- Frequently Asked Questions (FAQ)
Identifying Tap Leakage Causes
The first step to tackling your leaky tap is ultimately identifying the kinds of issues that cause taps to leak. Often, it can boil down to basic wear-and-tear or corroded parts. Continuous use wears out certain tap elements like the washer or valve seat over time, resulting in leaks.
It could also be due to poor initial installation or even high water pressure which can accelerate deterioration. If left unresolved, that annoying drip-drip may become a full-scale waterfall out of your tap.
According to the Environmental Protection Agency (EPA), household leaks can actually waste close to 1 trillion gallons of water annually nationwide! A single leaking bathtub tap, dripping at a moderate rate of about 10 drips per minute, can waste nearly five gallons daily.
Preparation Prior to Repair
Before embarking on any repair job, ensure you’ve turned off the water supply to your tap. This prevents any unwanted mesccidents leading to water damage. The last thing you’d want is a bathroom resembling a small pond!
You should then plug up your sink or bathtub drain. This simple step can save you from the hassle of having to retrieve dropped parts from your plumbing system.
If you’re a newcomer to DIY plumbing, it’s beneficial to take photos as you disassemble your tap. It’ll eliminate confusion during reassembly and make your project less intimidating.
Gathering Necessary Materials
Now that we have sealed off excess water flow and secured all easy-to-lose items, it’s time to gather our necessary tools.
Tools needed may vary depending on the type of tap and exact issue you’re facing. Basic requirements often include an adjustable wrench, Philips and flat-head screwdrivers, replacement washers or seals, and possibly plumber’s tape for resealing threaded connections.
Always ensure that any replacement parts are an exact match for the pieces that were originally part of your tap system. Incorrect parts may lead to further leaks or damage.
Initial Quick Fix Attempts
If the leak is not overly severe, a quick DIY fix may save you some time before needing a more intensive solution.
Most bathtub taps have screws located on their handles. Removing these can sometimes help you access inner parts that need tightening or replacing. But remember, over-tightening can cause further damage!
You should also check if any seals need replacing. Also, applying plumber’s tape around the threadings can sometimes help control minor leaks. If these attempts fail to stop the dripping, it’s time for an in-depth look into your plumbing issues
Sink and Tap Troubleshooting
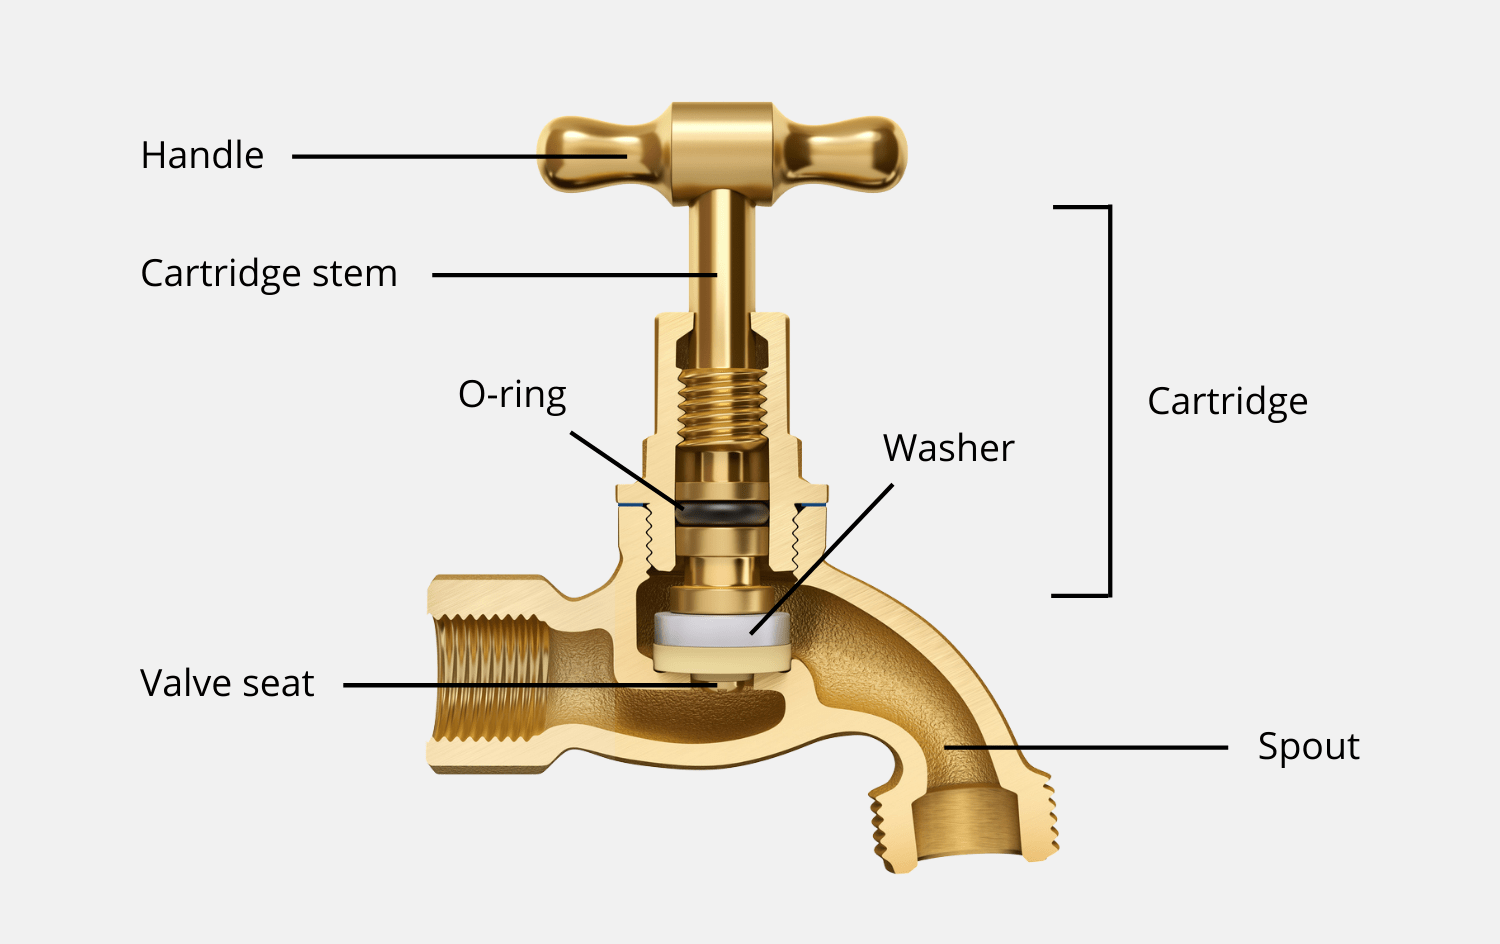
Upon seeing that the initial attempts haven’t halted the leak, we need to delve into some more complex tap troubleshooting. To do so, begin by removing the tap handle and examine the stem.
If the stem appears deteriorated or broken, replace it. A worn-out washer may also be the culprit behind your leaky tap. Changing it usually resolves the problem.
However, if these parts look fine, then you may be dealing with a more serious issue at hand. You may need to consider replacing your entire tap assembly or even reaching out to professional plumbing services for assistance.
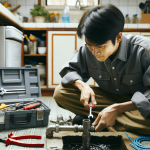
6-Step Leaking Tap Solution
When faced with a tap that won’t stop leaking despite small DIY efforts, here’s a solution that often works:
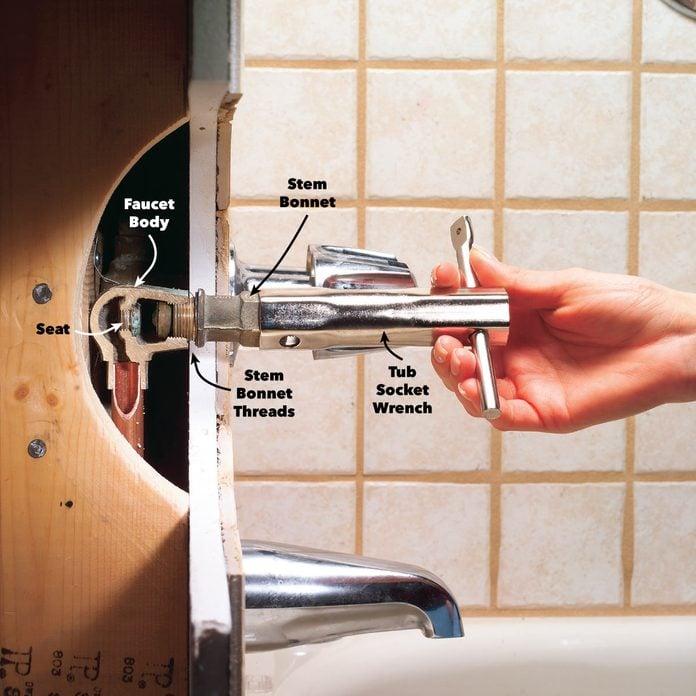
First, start by turning off the water and removing the tap handle. Second, remove the packing nut to access your tap’s stem. Third, remove the steam and inspect it along with your washer for any signs of damage.
Fourth, replace any damaged parts you find. Fifth, reassemble your tap and be careful not to tighten anything too much. Finally, turn on your water supply again and check for leaks.
While this procedure can seem a bit intimidating if you are not used to home repairs, wrestling the bull by its horns could help you save precious litres of water each week!
Valuable Hints for Repairs
A crucial suggestion during any plumbing repair is ensuring all replaced parts are identical to old ones. You can take them to your local hardware store for accurate replacement pieces.
If you’re having difficulty loosening any parts due to accumulation of mineral deposits; vinegar comes handy in breaking down these minerals and making removal smoother.
Lastly, don’t forget to check your work after you’re done. If the tap continues to leak or becomes hard to turn on and off, revisit the repair steps.
Please note that not all leaks are DIY-friendly. Emergencies or complex scenarios necessitate help from professionals. After all, water damage from plumbing disasters can be costly – both environmentally and economically!
Take Precautions, Stay Safe
Plumbing issues, especially a nagging leaking bathtub tap, can be a daunting and frustrating experience for most homeowners. However, before you venture unrestrainedly into DIY plumbing repairs, the first bricks of the foundation we’re laying involve establishing good safety practices. Here at Dan’s Plumbing, we emphasise priority to safety as paramount when dealing with any water fixtures.
The paramount thing to remember here is that electricity and water don’t mix. While this might sound like an age-old adage, you’d be surprised how often this principal rule is overlooked. According to an article in The Guardian, numerous injuries occur every year due to household mishaps involving electricity and water.
Apart from these general precautions, there are a few more specific protocols to know. First and foremost, before delving into any component of your plumbing system, always make sure to turn off the water mains or at least the water supply to the tap where you’re working. The last thing you want is an unintended geyser in your home because believe us, water damage is not fun (nor cheap!). This is especially valid if your home uses tankless water heating or a sump pump.
- Wear rubber-soled shoes or slippers: This increases your grip on what could be, a wet surface while providing some form of electrical insulation.
- Use insulated tools: Investing in tools with rubber handles can significantly minimize the risk of electric shock.
- Ensure proper lighting: Adequate light will help you work proficiently and securely.
Remember also to stay safe by tackling projects within your skill range. Dealing with complex hydraulic plumbing may be better left to professional plumbers. You might have a fighting spirit but being realistic about your own abilities is an often overlooked safety measure. Learn from us at Dan’s Plumbing; overconfidence can lead to accidents.
Understanding the Leaking Bathtub Tap
As highlighted by the Environmental Protection Agency (EPA), a leaking bathtub tap can waste approximately 5 gallons of water a day if it drips at a rate of 10 drips per minute. That means you’re essentially pouring water and money down the drain! Not only is this wasteful, but it also contributes negatively to our environment.
Hence, understanding what’s causing your bathtub tap to leak is crucial. A common culprit is often wear and tear on your tap (valve). Over time, parts become worn out or corroded, which can lead to leaks.
In addition, issues with water pressure or faulty installations could be underlying causes of your leaky tap. In homes with poor water management, the fluctuating pressures can lead to leaks as well.
Prolonging fixes for such leaks could eventually result in more substantial water damage and pump issues. This is why it’s essential to address such problems promptly with professional assistance or appropriate DIY guidance.
Conclusion: Fix It Right
In conclusion, don’t let your leaking bathtub tap become an environmental nuisance or financial burden. Be proactive in taking safety precautions before diagnosing the source of the leak. Whether you’re doing it yourself or calling in professionals like us at Dan’s Plumbing, acting promptly could save you significant water loss, reducing both your environmental footprint and utility costs significantly.
Frequently Asked Questions (FAQ)
1. Can I really fix a leaking bathtub tap by myself?
Yes, often, a leaking bathtub tap can be repaired with basic tools and some knowledge about basic plumbing components. However, it’s crucial that you follow good safety practices and don’t exceed your knowledge or skill level.
2. Can I prevent leaks from happening?
While wear and tear is inevitable, keeping taps well-maintained and regularly checking the tap components can help prevent or quickly spot leaks.
3. Can a minor leak cause damage?
Absolutely! Although a minor leak might seem like a small issue, if not addressed promptly, it can lead to significant water loss and even lead to damage of your property.
4. How can I tell if my washer needs replacing?
A worn-out washer often causes leaks. When you remove the stem from your tap, you can inspect the washer. If it looks brittle, cracked, or is missing a piece, it likely needs replacement.
5. What do I do if my tap continues to leak after I’ve replaced some parts?
If your tap continues to leak after troubleshooting, you may need to consider professional plumbing services. You could potentially need to replace the entire tap or there could be a significant underlying plumbing issue.
6. Can high water pressure cause a leak?
Yes, high water pressure can lead to or exacerbate leaks. It can cause quick wear and tear on your tap’s components.
7. Why does it matter if I use a different replacement part for my tap?
It’s crucial to use identical replacement parts because using an incorrect part can lead to further leaks or damage. It may also make your tap difficult to operate.
8. Why do I need to turn off the water supply before starting a repair job?
Turning off the water supply prevents any unwanted water spray or accidents that could lead to water damage. It’s essential to prevent a potential geyser scenario in your home!
9. Can a leaking tap significantly increase my utility bill?
Yes, a leaking tap, if left unaddressed over time, can result in significant water loss and a corresponding increase in your utility bill. According to the EPA, a leaking tap that drips at the rate of 10 drips per minute can waste nearly five gallons of water daily. That water loss can quickly add up on your utility bill.
10. Which parts commonly need replacing in a leaking tap?
The most common parts that need to be replaced in a leaking tap are the washer and the valve seat. However, it could be any part depending on the age and make of your tap. Hence, it’s crucial to inspect all components thoroughly.
- Can I Get a Plumber to Help Me Install An Under Sink Water Boiler in Our Office Kitchen? - September 14, 2024
- Can a Plumber Help Me Clear a Badly Clogged Toilet? - September 4, 2024
- Can a Plumber Help Me to Replace a Bathtub Drain Stopper? - August 29, 2024
Related posts:
 Can a Plumber Fix My Leaking Pipe?
 Can a Plumber Help Me Fix a Leaking Tap Handle?
 Is It Possible For a Plumber to Help Me Re-Caulk My Bathtub? Is This a Good Idea?
 Can Your Plumbers Help Me Fix a Leaking Shower Diverter?
 What Should I Do If My Bathtub Is Slow to Drain?
 What Should I Do If My Hot Water Service Is Leaking? Is It Time For a Plumber to Replace The Whole System?